Hakydans MK1 restoration
+14
Dunc
Duncs
Mintys-turbo-mk1
lewey
robr33gts
gtirx2
charliemk1
Speedy
Unograle
richvans
doody
jas_racing
vern
hakydan
18 posters
Page 3 of 5
Page 3 of 5 •  1, 2, 3, 4, 5
 Re: Hakydans MK1 restoration
Thanks Rich:) Well you can have a little peak now:)gtirx2 wrote:Great news mate
There nothing like the tension of driving it for the first drive after major rebuild and the wonder if it will live up to expectations.
I look forward to seeing this car at a show at some point to have a good nosey
So after her first shake down there are a couple of minor jobs I needed to do. A coolant hose clip was loose and I have a small oil leak but other than that all looks good.
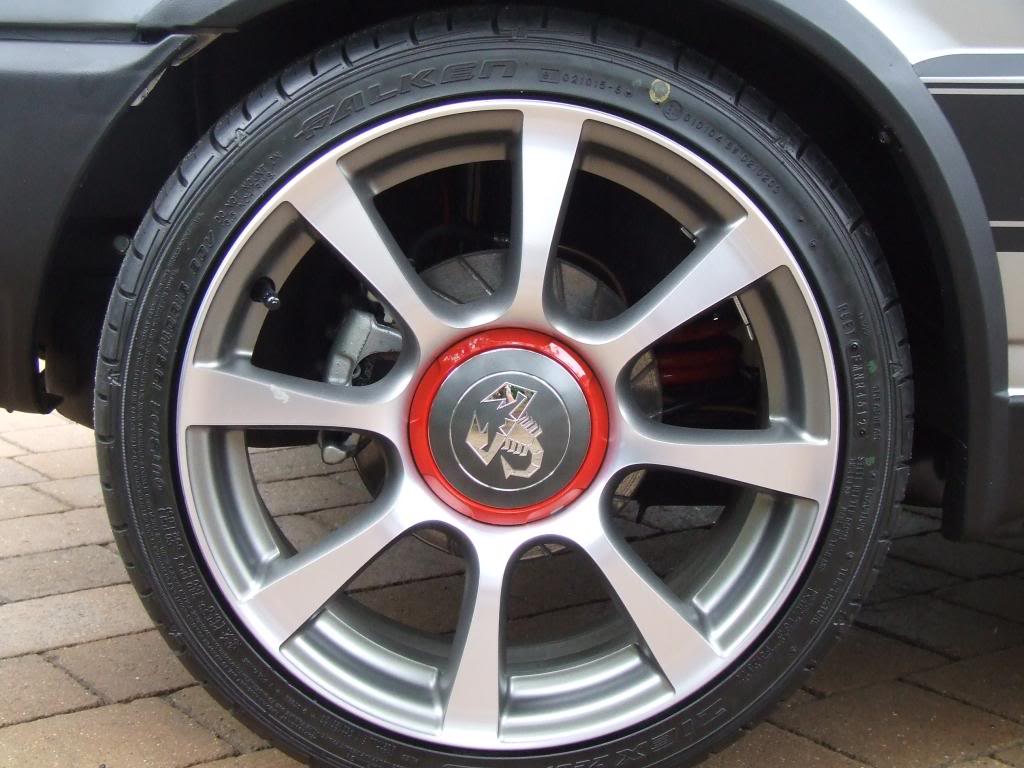
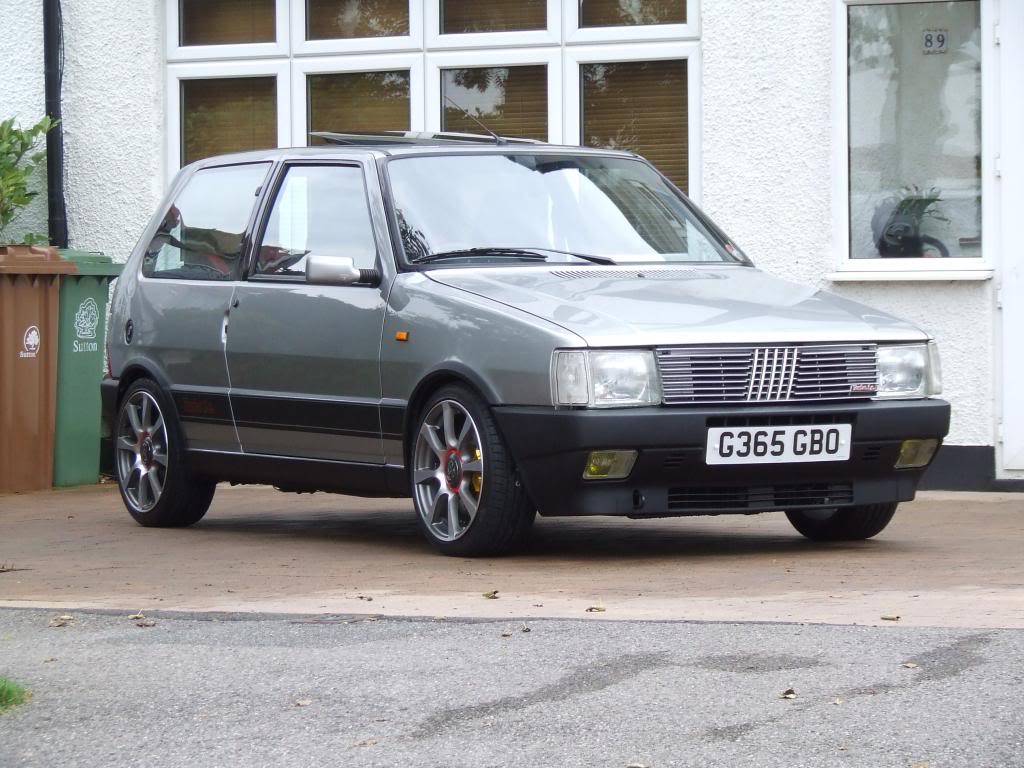
Now just to give a heads up, this build is not for the purists out there. I agree that the MK1 looks great in its standard form and once this one is finished that will be my next project. For the time being though with this one, I wanted to see if I could build a 21st century Mk1 as if Fiat/Abarth had done it. Here are the results.


hakydan- 4th gear

- Posts : 113
Join date : 2013-01-30
 Re: Hakydans MK1 restoration
wow looks great mate where did you find the fiat boot badge i got a new turbo ie one wouldnt mind a new fiat one to match

robr33gts- Over boosting

- Posts : 518
Join date : 2013-01-27
Age : 48
Location : lincoln
 Re: Hakydans MK1 restoration
Very nice looking uno. Will have to let us no how you get on with fitting the omex been thinking of fitting the 600 on my lancia engine.

Mintys-turbo-mk1- 5th gear

- Posts : 307
Join date : 2013-01-28
Age : 39
Location : Stowmarket
 Re: Hakydans MK1 restoration
Superb work and hats off to you mate.

charliemk1- Uno Veteran

- Posts : 293
Join date : 2013-01-27
Age : 60
Location : Dundee
 Re: Hakydans MK1 restoration
That is off the scale mate, looks superb and the seats really complete it.

vern- Moderator

- Posts : 274
Join date : 2013-01-27
Location : East sussex
 Re: Hakydans MK1 restoration
Very good. Such great quality finishing.

lewey- 2nd gear

- Posts : 27
Join date : 2013-02-16
 Re: Hakydans MK1 restoration
car looks great, not a fan of the wheels though but still overall looks awesome,
hows your brake pedal with those calipers?
thoses graphics looks mint i couldnt get mine straight and have done a bit of a hash job on my uno
hows your brake pedal with those calipers?
thoses graphics looks mint i couldnt get mine straight and have done a bit of a hash job on my uno

st1allstar- Over boosting

- Posts : 539
Join date : 2013-03-01
Age : 39
Location : west mids
 Re: Hakydans MK1 restoration
Its been a while since I updated so thought id get some new pics up of whats been going on in the garage.
Well since the last update I started stripping the engine down again in prep for the Omex 600 ECU. Both of the old ECUs and looms were removed along with the injectors, old aux pulley and various other components. Once that was all done I started by working out how I was going to get the crank sensor trigger wheel to work.
I looked at various different options but settled on buying a 36-1 trigger wheel and having my old pulley and the trigger wheel machined so that they could be fitted togther. The problem was that welding wasnt an option and neither was bolting them together:( So, they were machined so that the trigger wheel could be 'heated' on, something that I was very nervous of but in the end resulted in the perfect job.
Next I made up a replacement pipe that would replace the AFM as this is no longer needed and then wrapped the manifold as there is no way of getting a heat shield to work.
Then onto the injectors, something I had been calculating for some time. Ive decided that I don't want the car to run anymore than a very max of 200hp and will be very , very happy with circa 195 so I purchased a set of refurbished 315cc Injectors along with a MK1 injector rebuild kit so that I could use the OE ferrules and Pintle caps.
Once the 315's had been modified, the pintles were changed, all seals replaced and then fitted,Yey!!
Next, I need to order the sensors that ill be needing, Air temp, Map, etc as well as a new coil pack as I wont be running the car with a dizzy. Luckly I had a blanking plate from an X1/9 for the dizzy but ive just got to get it aqua blasted before I can fit it.


hakydan- 4th gear

- Posts : 113
Join date : 2013-01-30
 Re: Hakydans MK1 restoration
Looks like you have been having fun,how did you find getting the hose over the modded injectors?
Mine were a nightmare to get on with regular hose lol
I know they are a super tight fit and you are using the proper hose and fittings in the stock way, but even so I would still consider some hose clips aswell.
I cant help but look at the heat wrap and think hhmm but just what if lol,if that stuff gets saturated with fuel it would be a bugger to put out.
I only say this as my mate caught my old car alight
It was not fuel related but oil beleave it or not,the rocker cover was leaking and welled up down there and must of caught light of the manifold.
He was shit lucky really as all the hoses on the rail had just began to melt,if that went it would of been another story.
luckily he manage to put it out with one of them thick frijj milkshakes before the fire brigade turned up
Oh and the cars looking stunning mate, and I am especially liking the seats
 Re: Hakydans MK1 restoration
Cheers Rich:) Yeah its nice to know the end is in sight:) The hoses were really easy, I got the rebuild kit of a guy called Mr Injector who in his instructions suggests to dip the end of the hose (by 3mm) into DOT 4 brake fluid which makes fitting them really easy. Due to the fuel rail and the injectors having dual fitting heads, the use of the factory ferrules is 100% OK.gtirx2 wrote:Looks like you have been having fun,how did you find getting the hose over the modded injectors?
Mine were a nightmare to get on with regular hose lol
I know they are a super tight fit and you are using the proper hose and fittings in the stock way, but even so I would still consider some hose clips aswell.
I cant help but look at the heat wrap and think hhmm but just what if lol,if that stuff gets saturated with fuel it would be a bugger to put out.
I only say this as my mate caught my old car alight
It was not fuel related but oil beleave it or not,the rocker cover was leaking and welled up down there and must of caught light of the manifold.
He was shit lucky really as all the hoses on the rail had just began to melt,if that went it would of been another story.
luckily he manage to put it out with one of them thick frijj milkshakes before the fire brigade turned up
Oh and the cars looking stunning mate, and I am especially liking the seats
Re the heat wrap, I know what you mean but even though the manifold has been ceramic coated I still want to see if I can reduce the amount of heat sink around the inlet.
Im going to be fitting an engine bay extinguisher anyway, just to be safe:)
Yeah the seats, every time I sit in them I can't help but smile:D

hakydan- 4th gear

- Posts : 113
Join date : 2013-01-30
 Re: Hakydans MK1 restoration
Wow what a beauty! great work

richvans- 4th gear

- Posts : 220
Join date : 2013-01-29
 Re: Hakydans MK1 restoration
I also have fitted the rebuild kit from mr injector and have just used the ferrules, i couldnt physically pull the hose back off,

st1allstar- Over boosting

- Posts : 539
Join date : 2013-03-01
Age : 39
Location : west mids
 Re: Hakydans MK1 restoration
Looking great, hope to see this at retro show next year? Are you making your own loom or are you using the omex semi assembled loom?
Please keep an up date on the fitting of the omex:D I'm thinking next winter to fit on my lancia engine.
Please keep an up date on the fitting of the omex:D I'm thinking next winter to fit on my lancia engine.

Mintys-turbo-mk1- 5th gear

- Posts : 307
Join date : 2013-01-28
Age : 39
Location : Stowmarket
 Re: Hakydans MK1 restoration
WIth the bad weather we have all suffered the UT didnt get much attention over the winter but ive recently been cracking on with a few things.
The AFM has been removed and a pipe cut to size to replace it but I wanted it to be fixed in place rather than just being held in place by the hose clips. So I made up a little mount to connect it to where the AFM mounts were, keeping it as factory looking as possible.
Next was to work out where and how the coil pack would be mountd so it seemed logical to position it where the dizzy used to be. With the coil pack purchased I went about making a mount for it.
I also had to fit a new TPS and once again, new mounts were required,lol.
The next job is to mount the Map sensor and fit the ATS. Happy days:)


hakydan- 4th gear

- Posts : 113
Join date : 2013-01-30
 Re: Hakydans MK1 restoration
did you know the punto gt coil pack mounts straight onto the end of the cam in the same place as the dizzy with the bracket off a 1.6 8v engine (punto sporting or tipo)
is it going to be ready for the retro show?
is it going to be ready for the retro show?

st1allstar- Over boosting

- Posts : 539
Join date : 2013-03-01
Age : 39
Location : west mids
 Re: Hakydans MK1 restoration
st1allstar wrote:did you know the punto gt coil pack mounts straight onto the end of the cam in the same place as the dizzy with the bracket off a 1.6 8v engine (punto sporting or tipo)
is it going to be ready for the retro show?
I did Mark:) But the PGT coil pack doesn't work well with the Omex setup which is why I didnt use it plus its nice to have a 'one off' component:)
Its going to be ready for Auto Italia at Brooklands so yes, it will defo be ready for Retro Show.

hakydan- 4th gear

- Posts : 113
Join date : 2013-01-30
 Re: Hakydans MK1 restoration
your car is looking good, what sort of power are you hoping for?

st1allstar- Over boosting

- Posts : 539
Join date : 2013-03-01
Age : 39
Location : west mids
 Re: Hakydans MK1 restoration
st1allstar wrote:your car is looking good, what sort of power are you hoping for?
Thanks Mark:)
I don't really know and TBH, im not really fussed about out right power. The idea with this build has always been to create a car that Abarth/Fiat would have built so I want it to be a UT that will be reliable and fast. It turns out there is a name for what im doing, 'Resto mod' by all accounts:)
Last edited by Hakydan on Tue Apr 22, 2014 11:56 pm; edited 1 time in total

hakydan- 4th gear

- Posts : 113
Join date : 2013-01-30
 Re: Hakydans MK1 restoration
this is a beautiful little uno with great attention to detail mate.

doody- 5th gear

- Posts : 316
Join date : 2013-02-04
Age : 48
Location : crowland
 Re: Hakydans MK1 restoration
doody wrote:this is a beautiful little uno with great attention to detail mate.
Thanks buddy and to all for the positive feedback:)
Its been a while since my last update so I thought id get on here and get one done:) Well the Omex installation is finally finished, its taken some time but this was one area of the build I was in absolutely no rush to finish, besides, ive been working on the UT for 3 years now so a few more days or weeks wont make too much of a difference:)
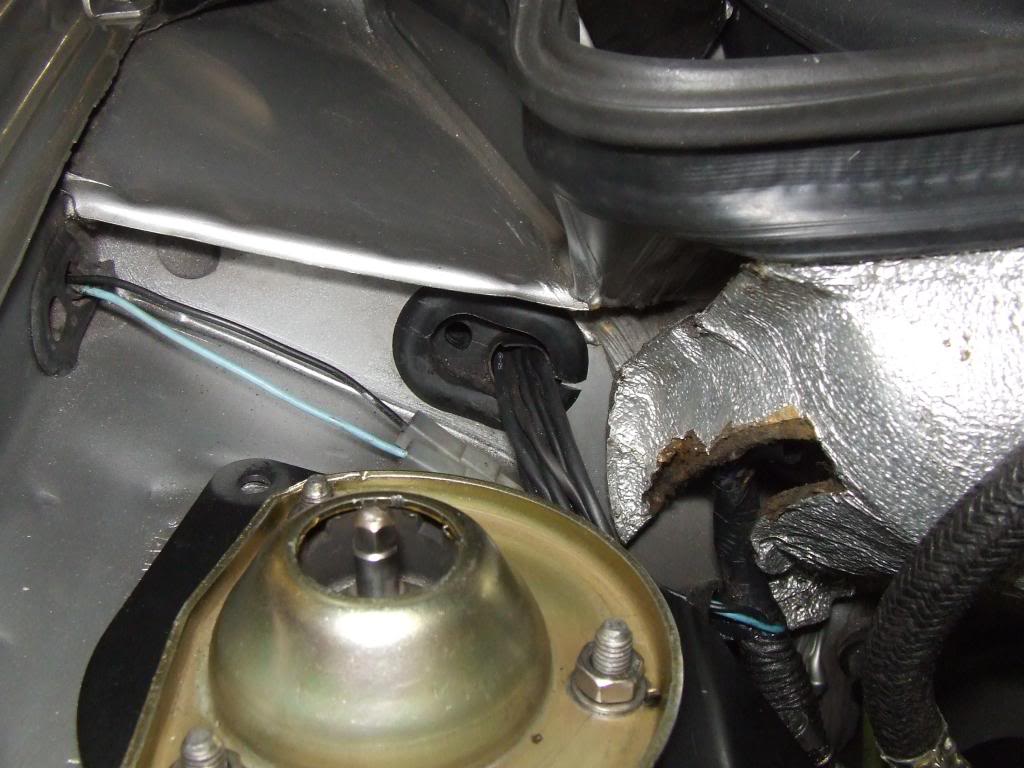
So, as with everything else I wanted to keep it looking as 'factory as possible so the ECU was positioned under the drivers side of the dash board where the factory Bosch ECU was along with the bank of relays. The loom was then fed through the hole at the top of the bulk head and the factory grommet was used to seal and provide a nice clean factory look.
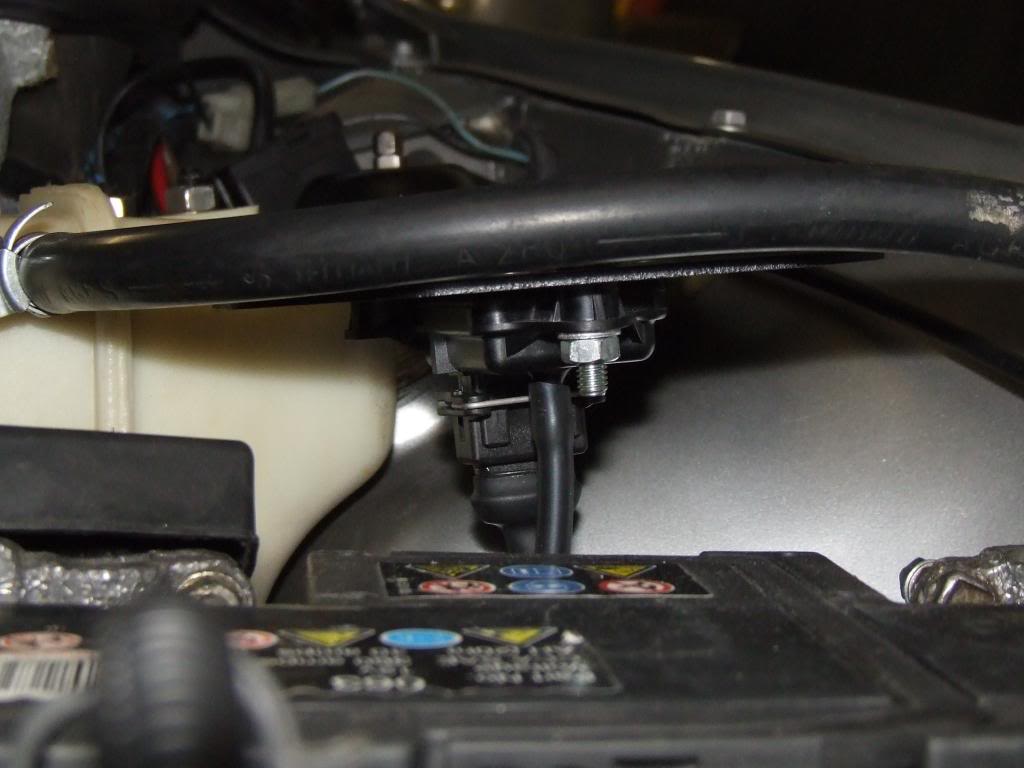
The loom I used is the Pro-Drive made race loom which wasn't really necessary but its the best so I just had to have it, no point in cutting corners I guess. The ATS was fitted into the air intake and the Magnetti 2.5Bar MAP sensor was fitted where where the factory coil was using the same holes:)
There were a few other small jobs to do but it finally got done. It was then time to have it mapped, I could have done it from the Omex software but there is a reason why good tuners charge a fortune for mapping...its a dark art;)
So what was the aim, well following many conversation with the tuner and informing him of what had been done to the UT and most importantly what I wanted as a driving experience, the decision was made.
I had the UT dropped off at the tuners and left the country for a little R&R with the family. Two weeks later im back in the country and heading over to Essex to get it.
WOWWEWOOOOOWAAAAAAA!!! Ha, ha, ha.
I am a very, very happy guy. My son Kynan who has been working on the UT with me is now 10 and said we should give it a code name like the McLaren MP4-12C. It seemed like a good idea so we gave it some serious thought and after a a couple of days settled on one:)
Gents, the KM79-223
Oh and there are a couple of pics I forgot to post including Kynan, my 10 year old welding,lol


hakydan- 4th gear

- Posts : 113
Join date : 2013-01-30
 Re: Hakydans MK1 restoration
How hard was it to fit? and what sensors did you need to buy?
I just started looking into buying the ecu this week think i will give them a call soon.

Mintys-turbo-mk1- 5th gear

- Posts : 307
Join date : 2013-01-28
Age : 39
Location : Stowmarket
 Re: Hakydans MK1 restoration
Happy days mate,so this uno is now pretty much complete,it really has been an awesome build from start to finish 
What power did it make then, or is the clue in the code name
What power did it make then, or is the clue in the code name
 Re: Hakydans MK1 restoration
gtirx2 wrote:Happy days mate,so this uno is now pretty much complete,it really has been an awesome build from start to finish
What power did it make then, or is the clue in the code name
Yep, its all complete now apart from the carpet mats that im waiting on,lol.
As ive said from the start Rich, ive not been looking for all out power but a nice linear torque curve instead. So I asked the tuners to concentrate on smooth, progressive power delivery that could be driven reliably day in, day out.
But yes, lol, the clue is in the code name;)

hakydan- 4th gear

- Posts : 113
Join date : 2013-01-30
 Re: Hakydans MK1 restoration
Hakydan wrote:But yes, lol, the clue is in the code name;)
79bhp isn't much after all the work you've done?!
I don't suppose you have any close up pics of how your fse attaches to the fuel rail?

jas_racing- 5th gear

- Posts : 314
Join date : 2013-01-29
Age : 48
Location : Peterborough
Page 3 of 5 •  1, 2, 3, 4, 5
 Similar topics
» mk1 restoration
» My mk2 uno restoration web page.
» Fiat Uno Mk1 Abnormal Restoration :D
» MK1 Barn find restoration
» light blue metallic mk1 g reg restoration
» My mk2 uno restoration web page.
» Fiat Uno Mk1 Abnormal Restoration :D
» MK1 Barn find restoration
» light blue metallic mk1 g reg restoration
Page 3 of 5
Permissions in this forum:
You cannot reply to topics in this forum
 Home
Home


